WEB/React
홈페이지 만들어보기[상품 목록 조회](with SpringBoot) - (7)
luckydadit
2025. 2. 20. 17:08
1. 상품 목록 조회 이벤트 처리하기
1.1 상품 정보 테이블 만들기

Category.java에 추가 (with. IntelliJ)
package com.coffee.constant;

// 상품의 카테고리 정보를 나타내기 위한 열거형 상수
public enum Category {
    BREAD("빵"),
    BEVERAGE("음료수"),
    CAKE("케익");

    private final String description;

    Category(String description) {
        this.description = description;
    }

    public String getDescription() {
        return description;
    }
}
Product.java에 추가 (with. IntelliJ)
package com.coffee.entity;

import com.coffee.constant.Category;
import jakarta.persistence.*;
import lombok.Getter;
import lombok.Setter;

import java.time.LocalDate;

// 상품 1개를 의미하는 자바 클래스

@Getter
@Setter
@Entity
@Table(name = "products")
public class Product {
    // 엔터티 코딩 작성시 실제 제약 조건도 고려해야 합니다.
    @Id
    @GeneratedValue(strategy = GenerationType.IDENTITY)
    private Long id;

    @Column(nullable = false)
    private String name;

    @Column(nullable = false)
    private int price = 0;

    @Enumerated(EnumType.STRING)
    private Category category; // Enum으로 변경 예정

    @Column(nullable = false)
    private int stock = 0;

    @Column(nullable = false)
    private String image;

    @Column(nullable = false, length = 1000)
    private String description;

    private LocalDate inputdate;

}
위의 Products.java 파일을 생성 후, coffeeApplication을 Run하면 Console 창에 아래와 같이 테이블이 생성됩니다.
Hibernate:
create table products (
id bigint not null auto_increment,
category enum ('BEVERAGE','BREAD','CAKE'),
description varchar(1000) not null,
image varchar(255) not null,
inputdate date,
name varchar(255) not null,
price integer not null,
stock integer not null,
primary key (id)
) engine=InnoDB
<MySQL 실행결과>

1.2 상품 정보 조회 처리 로직 생성하기(with. SpringBoot)

ProductController.java에 추가 (with. IntelliJ)
package com.coffee.controller;

import com.coffee.entity.Product;
import com.coffee.service.ProductService;
import org.springframework.http.ResponseEntity;
import org.springframework.web.bind.annotation.GetMapping;
import org.springframework.web.bind.annotation.RequestMapping;
import org.springframework.web.bind.annotation.RestController;

import java.util.List;

// 상품 정보 요청을 처리해주는 Controller
// RequestMapping에 여러 개의 요청을 처리하려면 중괄호 기호를 사용하면 됩니다.
@RestController
@RequestMapping({"product", "products"})
public class ProductController {
    private ProductService productService;

    public ProductController(ProductService productService) {
        this.productService = productService; // 생성자 주입
    }

    @GetMapping("/list") // 상품 목록 보여 주세요.
    public ResponseEntity<List<Product>> list(){
        List<Product> products = this.productService.listProducts();
        System.out.println("상품 개수 : " + products.size());

        // http 응답 코드 200(성공)과 함께 상품 정보를 json으로 반환해줍니다.
        return ResponseEntity.ok(products);
    }


}
ProductService.java에 추가 (with. IntelliJ)
package com.coffee.service;

import com.coffee.entity.Product;
import com.coffee.repository.ProductRepository;
import org.springframework.beans.factory.annotation.Autowired;
import org.springframework.stereotype.Service;

import java.util.List;

@Service
public class ProductService {
    @Autowired
    private ProductRepository productRepository;

    public List<Product> listProducts(){
        return this.productRepository.findAllByOrderByIdDesc();
    }

}

ProductRepository.java에 추가 (with. IntelliJ)
package com.coffee.repository;

import com.coffee.entity.Product;
import org.springframework.data.jpa.repository.JpaRepository;

import java.util.List;

public interface ProductRepository extends JpaRepository<Product, Long> {
    List<Product> findAllByOrderByIdDesc(); // id를 기준으로 내림차순 정렬하기

}
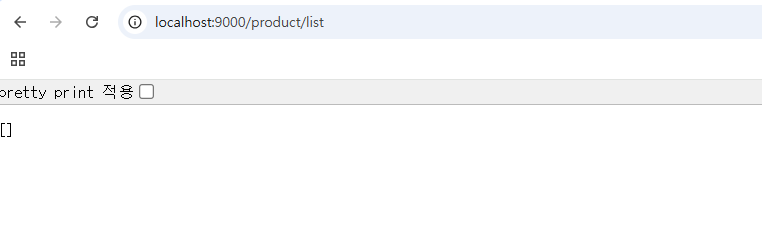
<실행결과>
URL - http://localhost:9000/product/list
SpringBoot의 콘솔창에 확인한 결과(with. IntelliJ)
Hibernate:
select
p1_0.id,
p1_0.category,
p1_0.description,
p1_0.image,
p1_0.inputdate,
p1_0.name,
p1_0.price,
p1_0.stock
from
products p1_0
order by
p1_0.id desc
상품 개수 : 0
1.3 상품 정보 조회 화면 만들기(with. React)
ProductList.js에 추가(with. VSCode)
function App(){
return(
<>
상품 목록 페이지
</>
);
};
export default App;
App.js에 추가 및 수정한 부분(with. VSCode)
// 라우팅 관련 컴포넌트
import HomePage from './pages/HomePage';
import LoginPage from './pages/LoginPage';
import SignupPage from './pages/SignupPage';
import ProductList from './pages/ProductList';
<Route path='/member/login' element={<LoginPage setUser={handleLoginSuccess} />}/>
<Route path='/member/signup' element={<SignupPage/>}/>
<Route path='/member/list' element={<ProductList/>}/>
default:
return(
<>
<Nav.Link style={{color:"white"}} href='/member/list'>상품 보기</Nav.Link>
<Nav.Link style={{color:"white"}} href='/member/login'>로그인</Nav.Link>
<Nav.Link style={{color:"white"}} href='/member/signup'>회원 가입</Nav.Link>
</>
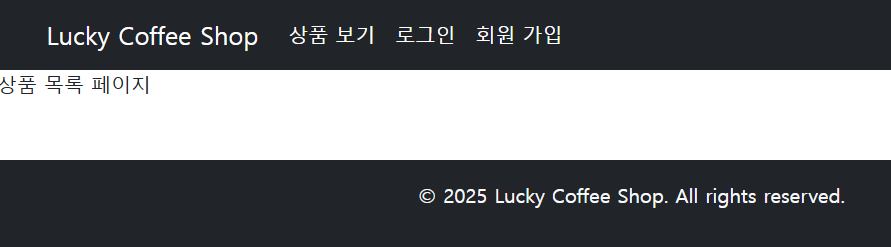
<적용결과>

상품 보기 클릭시, ProductList.js 페이지로 이동을 확인할 수 있습니다.
1.4 상품 정보 임시 데이터 만들기(with. IntelliJ)
1.4.1 테스트 환경 구성하여 사전 테스트해보기
pom.xml 내용 수정
<scope>test</scope> 를 제거한 후, ProductTest.java 파일을 생성합니다. (@SpringBootTest와 관련됨)
<dependency>
    <groupId>org.springframework.boot</groupId>
    <artifactId>spring-boot-starter-test</artifactId>
</dependency>

ProductTest.java 추가
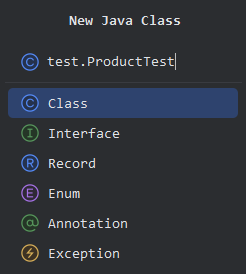
package com.coffee.test;

import com.coffee.common.GenerateData;
import org.junit.jupiter.api.Test;
import org.springframework.boot.test.context.SpringBootTest;

import java.util.List;

@SpringBootTest
public class ProductTest {

    @Test
    public void testCreateProducts(){
        List<String> imageFileList = GenerateData.getImageFileNames();

        for(String image : imageFileList){
            System.out.println(image);
        }
    }
}
GenerateData.java 추가
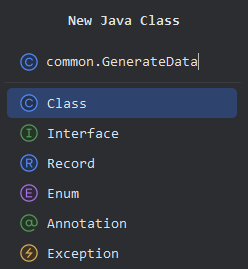
package com.coffee.common;

import java.io.File;
import java.util.ArrayList;
import java.util.Arrays;
import java.util.List;

public class GenerateData {
    // 윈도우 폴더 구분자는 \인데 특수 문자이므로 반드시 \\로 표기해야 합니다.
    private static final String IMAGE_DIR = "d:\\boot\\images";

    public static List<String> getImageFileNames() {
        // 특정 폴더 내에 들어 있는 모든 이미지 파일을 문자열 List 형식으로 반환합니다.
        File folder = new File(IMAGE_DIR);
        List<String> imageFiles = new ArrayList<String>();

        if(folder.exists() == false && folder.isFile()){
            System.out.println("해당 폴더가 존재하지 않습니다." + IMAGE_DIR);

            return imageFiles;
        }

        // 확장자가 다음 항목인 파일들만 추출
        String[] imageExtensions = {".jpg", ".jpeg", ".png"};

        File[] fileList = folder.listFiles();

        for(File file : fileList){
            if (file.isFile() && Arrays.stream(imageExtensions)
                    .anyMatch(ext -> file.getName().toLowerCase().endsWith(ext))) {
                imageFiles.add(file.getName());
            }
        }

        return  imageFiles;
    }
}
<테스트 결과>
ProductTest 를 실행(Run)한 후, 콘솔창을 확인합니다.
americano01.png
americano02.png
americano03.png
avante.png
brioche_01.png
brioche_02.png
brioche_03.png
brioche_04.png
brioche_05.png
cappuccino01.png
cappuccino02.png
cappuccino03.png
chicago.jpg
child1.jpg
... (이하 생략)
1.4.2 테스트 환경을 사용하여 MySQL(DB)에 샘플 데이터 insert하기
ProductTest.java 수정 부분 (with. IntelliJ)
package com.coffee.test;

import com.coffee.common.GenerateData;
import com.coffee.constant.Category;
import com.coffee.entity.Product;
import com.coffee.repository.ProductRepository;
import org.junit.jupiter.api.Test;
import org.springframework.beans.factory.annotation.Autowired;
import org.springframework.boot.test.context.SpringBootTest;

import java.time.LocalDate;
import java.util.List;

@SpringBootTest
public class ProductTest {

    @Autowired
    private ProductRepository productRepository;

    @Test
    public void testCreateProducts(){
        List<String> imageFileList = GenerateData.getImageFileNames();

//        for(String image : imageFileList){
//            System.out.println(image);
//        }
        for (int i = 0; i < imageFileList.size(); i++) {
            Product bean = new Product();
            //bean.setId();
            bean.setName("상품" + i);
            bean.setCategory(Category.BREAD);
            bean.setImage(imageFileList.get(i));
            bean.setPrice(10*(i+1));
            bean.setStock(100*(i+1));
            bean.setDescription("상품 설명 " + i);
            bean.setInputdate(LocalDate.now());

            productRepository.save(bean);
        }
    }
}
<실행 결과>
ProductTest 를 실행(Run)한 후, 콘솔창을 확인합니다.
Hibernate:
insert
into
products
(category, description, image, inputdate, name, price, stock)
values
(?, ?, ?, ?, ?, ?, ?)
Hibernate:
insert
into
products
(category, description, image, inputdate, name, price, stock)
values
(?, ?, ?, ?, ?, ?, ?)
----------(이하 생략)-------------
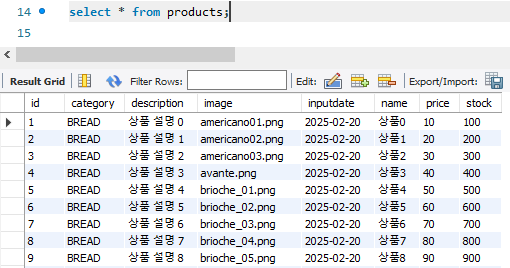
<MySQL 결과 확인>
1.4.3 샘플 데이터를 기반으로 상품 목록 보기에 보여주기(with. React)
ProductList.js에서 수정한 부분(with. VS Code)
import axios from "axios";
import { useEffect, useState } from "react";
import { Container, Row } from "react-bootstrap";
function App(){
const [products, setProducts] = useState([]); // 상품 목록 state
useEffect(() => { // BackEnd 서버에세 데이터를 읽어 오기
axios.get("http://localhost:9000/product/list")
.then((response) => {
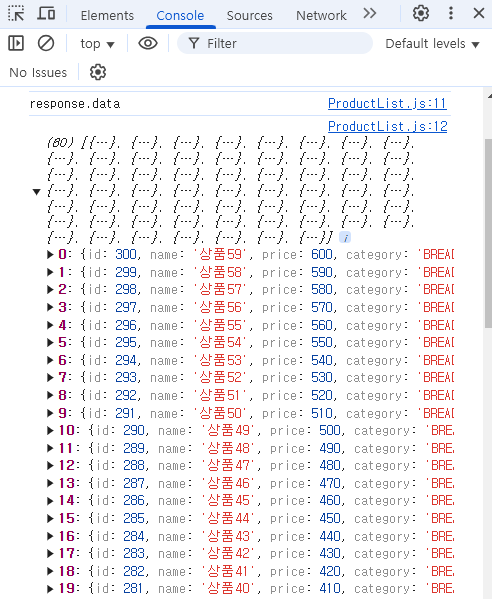
console.log('response.data');
console.log(response.data);
setProducts(response.data || []); // 데이터가 안올 경우, []로 대체한다는 의미임.
})
.catch((error) => {
console.error(error);
});
}, []); // 2번째 매개 변수 []로 인하여 딱 1번만 rendering합니다.
return(
<Container className="my-4">
<h1>상품 목록 페이지</h1>
<Row>
</Row>
</Container>
);
};
export default App;
<적용결과>
ProductList.js에서 수정한 부분(with. VS Code)
<Container className="my-4">
<h1>상품 목록 페이지</h1>
<Row>
{products.map((product) => (
<Col key={product.id} md={4} className="mb-4">
<Card className="h-100">
<Card.Img
variant="top"
src={`http://localhost:9000/images/${product.image}`} // image는 DB 컬럼명
alt={product.name}
style={{width:'100%', height:'200px', objectFit:'cover'}} />
</Card>
</Col>
))}
</Row>
</Container>
<적용결과>

ProductList.js에서 수정한 부분(with. VS Code)
<Container className="my-4">
<h1>상품 목록 페이지</h1>
<Row>
{products.map((product) => (
<Col key={product.id} md={3} className="mb-3">
<Card className="h-100">
<Card.Img
variant="top"
src={`http://localhost:9000/images/${product.image}`} // image는 DB 컬럼명
alt={product.name}
style={{width:'100%', height:'200px', objectFit:'cover'}} />
<Card.Body>
<Card.Title>{product.name}</Card.Title>
<Card.Text>가격 : {product.price}원</Card.Text>
<Link to={``}>
<Button variant="info" className="me-2">상세 보기</Button>
</Link>
<Link to={``}>
<Button variant="warning" className="me-2">수정</Button>
</Link>
<Button variant="danger" className="me-2">삭제</Button>
</Card.Body>
</Card>
</Col>
))}
</Row>
</Container>
<적용결과>
